Indulge your senses with the exquisite delight of homemade chocolate bonbons! These delectable treats, with their smooth, rich chocolate shells and irresistible walnut centers, are surprisingly simple to create. Forget expensive chocolatiers; this recipe empowers you to craft luxurious bonbons in your own kitchen, using readily available ingredients. The perfect combination of creamy chocolate and crunchy walnuts offers a delightful textural contrast that will tantalize your taste buds. Imagine the satisfaction of gifting these handcrafted treasures, or simply savoring them as a well-deserved treat.
Ready to embark on this delicious journey? This easy-to-follow recipe will guide you through each step, from melting the chocolate to creating perfectly formed bonbons, ensuring a flawless and irresistible result every time. Let's get started and create some chocolate magic!
Tools Needed
- Microwave or double boiler
- Molcajete (or food processor)
- Small cup
- Lollipop sticks
- Small plate
- Baking paper
Ingredients
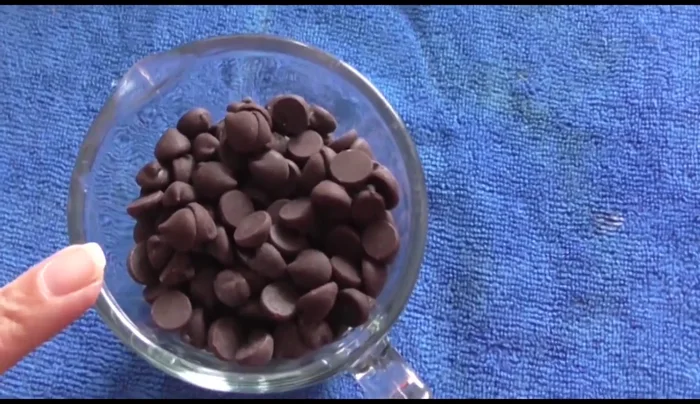
- Chocolate (semisweet or bitter)
- Vegetable shortening or butter
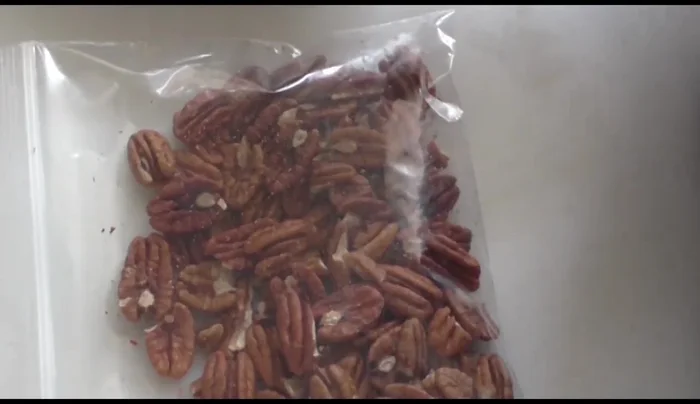
- Walnuts
- Wooden sticks
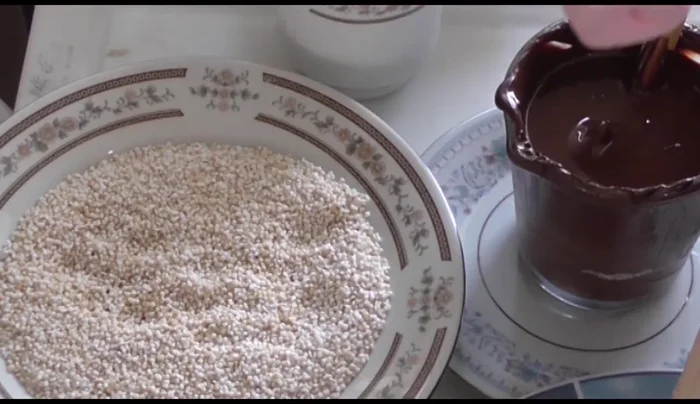
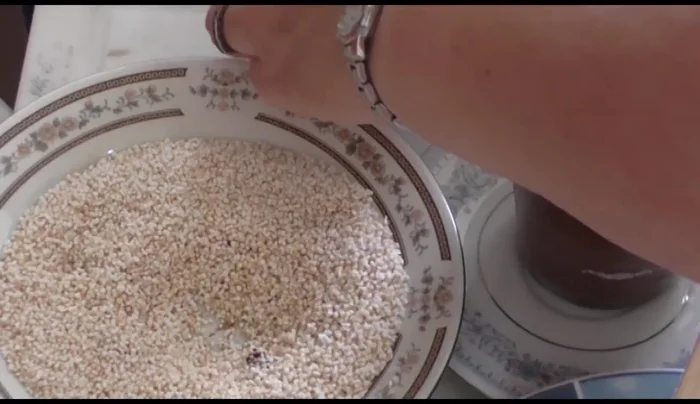
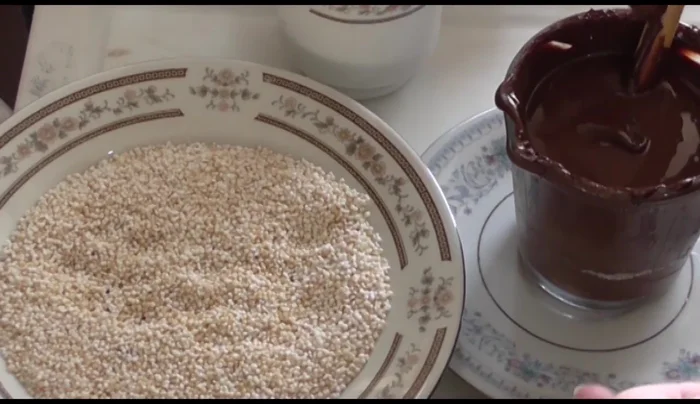
- Amaranth
Step-by-Step Instructions
Step 1. Prepare the Ingredients and Chocolate
- Melt the chocolate in a microwave or double boiler. Add vegetable shortening or butter if needed to help it melt smoothly.
Step 2. Coat the Candies
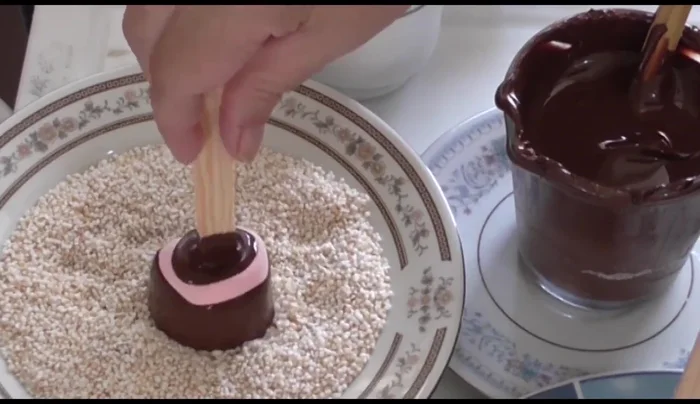
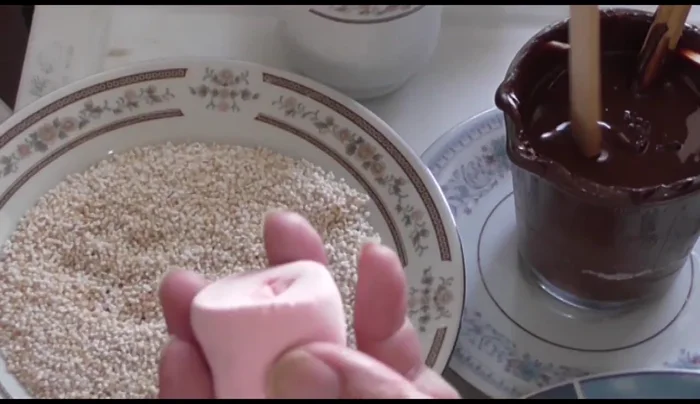
- Dip the candies in the melted chocolate, ensuring they are fully coated.
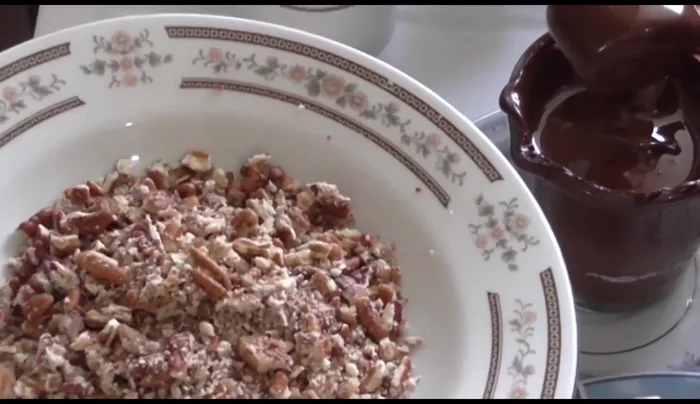
- Roll the chocolate-covered candies in amaranth or chopped walnuts.
- Place the coated candies in a small cup to hold them while the chocolate sets, then refrigerate for quick cooling.
- Repeat steps 5-7 for remaining candies.
Step 3. Prepare the Bonbons
- Chop or crush the walnuts using a molcajete or food processor.
- Prepare the lollipop sticks by making a small hole in each one and adding a little chocolate to secure the candies later.
- Insert the lollipop sticks into the candies.
Step 4. Set and Finish
- Place the finished candies on a tray lined with baking paper and let them set completely.
Read more: Quick & Easy Pantry Mexican Rice with Rotel
Tips
- Use your preferred type and size of chocolate.
- You can use different toppings like colored chocolates or other nuts.
- Get creative with shapes and designs.
Nutrition
- Fat: 12-20g
- Carbs: 10-18g
- Protein: 2-4g
FAQs
1. Can I use different nuts besides walnuts?
Absolutely! Almonds, pecans, or hazelnuts would all be delicious substitutions. Just be sure to adjust the quantity based on the size and type of nut you choose.
2. How can I store my finished bonbons?
Store them in an airtight container in the refrigerator for up to a week. They'll keep best at a cool, consistent temperature.
With a little patience and these simple instructions, you've now mastered the art of making decadent chocolate-covered walnut bonbons. These elegant treats are perfect for sharing with loved ones or indulging in yourself. Enjoy the sweet reward of your culinary creation!