Indulge your senses with these delightful fruity tartlets, a perfect blend of buttery pastry, creamy pastry cream, and the vibrant burst of fresh seasonal fruit. These elegant little desserts are surprisingly easy to make, and the results are undeniably impressive – perfect for a sophisticated gathering or a simple afternoon treat. Imagine the satisfying crunch of the golden-brown pastry shell, yielding to the smooth, vanilla-infused pastry cream, all topped with glistening, jewel-toned fruit. The homemade glaze adds a final touch of sweetness and shine, elevating these tartlets to a truly special experience.
This recipe provides a step-by-step guide to creating these stunning treats from scratch, ensuring even novice bakers can achieve professional-looking results. From making the flaky pastry to whipping up the luscious pastry cream and arranging the fruit for maximum visual appeal, we’ll walk you through each stage with clear instructions and helpful tips. Let's get started on creating these irresistible fruity tartlets!
Tools Needed
- Microwave or double boiler
- Mixing bowl
Ingredients
- Peach syrup (from canned peaches): 1 cup
- Water (room temperature): 2 tablespoons
- Unflavored gelatin: 1 tablespoon
- Pastry cream
- Peaches (sliced)
- Kiwi (sliced)
- Strawberries (sliced)
- Tart shells
Step-by-Step Instructions
Step 1. Prepare the Peach Glaze
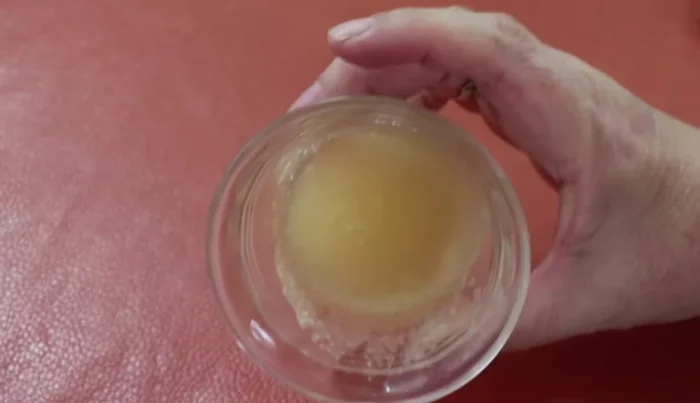
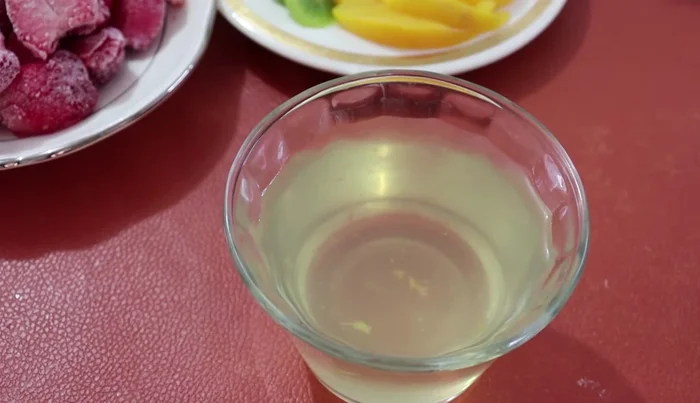
- Combine peach syrup, water, and gelatin in a bowl. Heat until gelatin is dissolved (microwave or double boiler). Let it rest until set like a sponge (around 2 minutes).
- Heat the set gelatin for about 30 seconds in the microwave or until liquid.
- Add the melted gelatin to the peach syrup and stir until well combined. Let rest for 10 minutes, then stir again.

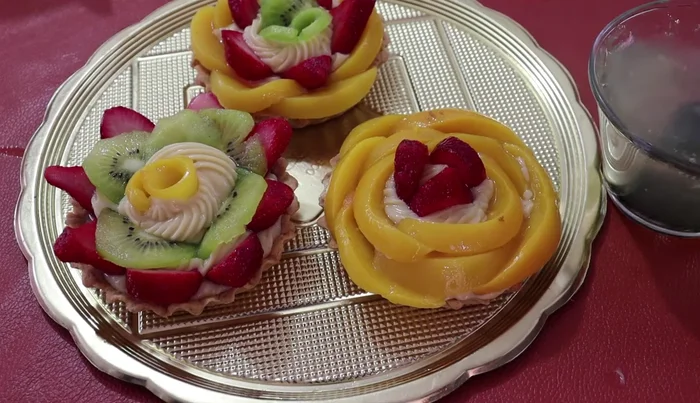
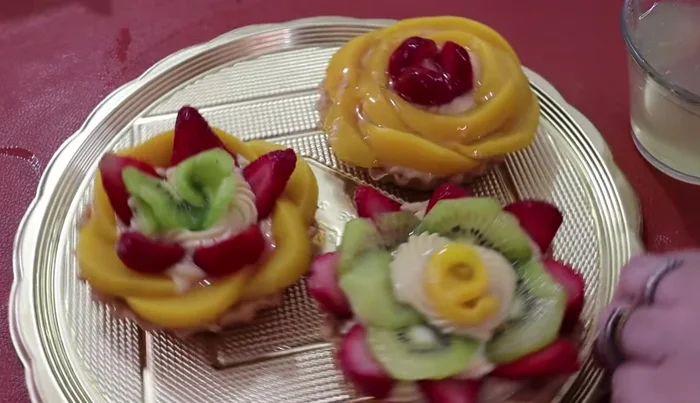
Step 2. Assemble the Tartlets
- Fill tart shells with pastry cream. Arrange sliced peaches, kiwi, and strawberries on top, creating a decorative design.

Step 3. Glaze and Decorate
- Gently brush the gelatin glaze over the fruit to add shine and prevent drying.
Step 4. Chill and Serve
- Refrigerate the tartlets to set the glaze and keep the fruit fresh. Cover tartlets or store in individual containers to prevent drying.
Read more: Quick & Easy Pantry Mexican Rice with Rotel
Tips
- Use a variety of fruits for color and flavor.
- Thinly sliced kiwi is easier to arrange.
- Store tartlets in the refrigerator, covered or in individual containers to prevent them from drying out.
Nutrition
- Calories: varies
- Fat: variesg
- Carbs: variesg
- Protein: variesg
FAQs
1. Can I use store-bought pastry cream instead of making my own?
Yes, absolutely! Using store-bought pastry cream will save you time, but making your own offers a more customized flavor profile.
2. What kind of fruit is best for these tartlets?
Almost any fruit works! Berries, stone fruits (peaches, plums), and even citrus fruits make delicious fillings. Choose fruits that are in season for the best flavor.
3. How far in advance can I make the tartlets?
The tart shells can be made a day or two ahead. Assemble the tartlets and glaze them just before serving for the best texture and appearance.
These fruity tartlets, with their delicate pastry, creamy filling, and vibrant fruit topping, are a delightful treat that's perfect for any occasion. The effort invested in making them from scratch is well worth the reward of these beautiful and delicious desserts. Enjoy the compliments and savor every bite!